
How to Stain an Outdoor Wood Bench: A Complete Guide
Share
Staining an outdoor wood bench is a rewarding project that not only enhances its appearance but also extends its lifespan by protecting it from the elements. I'll walk you through the entire process step by step, from preparation to finishing touches.
What You'll Need
Materials:
- Wood stain (exterior-grade)
- Wood sealer or exterior polyurethane (optional)
- Wood cleaner or mild soap
- Wood conditioner (optional, recommended for pine or soft woods)
- Rags or old t-shirts (lint-free)
- Drop cloth or plastic sheeting
- Plastic gloves
- Painter's tape (if needed)
Tools:
- Paintbrush (natural bristle or foam)
- Sanding block
- Bucket
- Garden hose or pressure washer
- Screwdriver (to remove hardware if applicable)
Step 1: Choose the Right Day
Select a day with moderate temperatures (between 50-85°F) and low humidity. Avoid staining on extremely hot days or when rain is expected within 24-48 hours.
Step 2: Prepare Your Work Area
Lay down a drop cloth or plastic sheeting under and around your bench to protect the ground. Move the bench to a well-ventilated area, ideally outdoors or in a garage with doors open.
Step 3: Clean the Bench
Before applying any stain, you need to start with a clean surface:
- Remove any hardware or accessories from the bench if possible
- Wash the bench with wood cleaner or mild soap and water
- Rinse thoroughly with water
- Allow the bench to dry completely (at least 24 hours)
Step 4: Sand the Surface
Sanding creates a smooth surface for even stain absorption. This step is crucial for achieving professional results:
Start with medium-grit sandpaper (120-150 grit) and sand in the direction of the wood grain. Then progress to finer grit sandpaper (180-220 grit) for a smoother finish. Once done, remove all dust with a tack cloth or vacuum.
Step 5: Apply Wood Conditioner (Optional)
For softwoods like pine, cedar, or fir, a wood conditioner helps achieve even staining:
- Apply conditioner following the manufacturer's instructions
- Usually, you'll let it penetrate for 5-15 minutes
- Wipe off excess with a clean cloth
- Apply stain within 2 hours of conditioning
Step 6: Stir the Stain
Thoroughly stir (don't shake) your wood stain to mix the pigments that settle at the bottom. This ensures consistent color.
Step 7: Test the Stain
Always test your stain on an inconspicuous area or scrap wood to confirm the color meets your expectations.
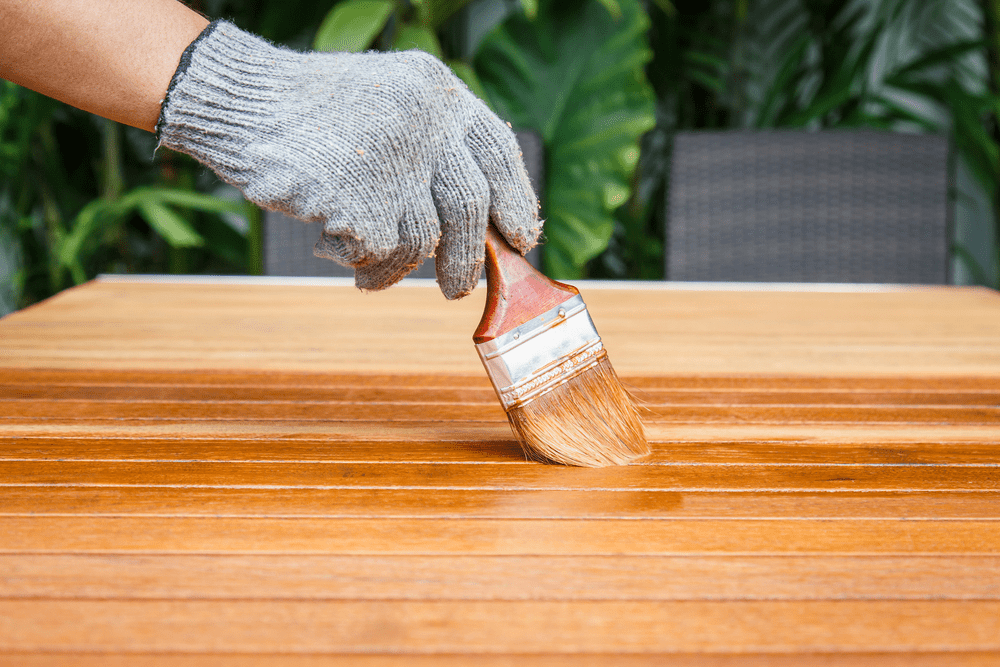
Step 8: Apply the First Coat of Stain
The application process requires patience and attention to detail:
Put on your gloves and dip your brush or cloth in the stain. Apply the stain in the direction of the wood grain using long, even strokes, working in manageable sections (one board at a time). Allow the stain to penetrate according to the manufacturer's instructions (typically 5-15 minutes), then wipe off excess stain with a clean, lint-free cloth before it dries.
Remember: The longer you leave the stain before wiping, the darker the color will be.
Step 9: Assess and Apply Additional Coats
- Allow the first coat to dry completely (typically 4-24 hours)
- Determine if you want a deeper color
- Apply additional coats following the same process
- Each coat will darken the wood further
Step 10: Apply a Protective Finish (Optional but Recommended)
For outdoor benches, a protective topcoat extends the life of your stain:
Choose an exterior-grade polyurethane, varnish, or sealer. Apply with a clean brush in the direction of the wood grain, using 2-3 coats for maximum protection. Allow proper drying time between coats and lightly sand between coats with fine-grit sandpaper (220 grit).
Step 11: Reinstall Hardware
Once everything is completely dry (usually 24-48 hours after the final coat), reinstall any hardware you removed.
Step 12: Maintenance
To keep your bench looking beautiful for years:
- Clean your bench regularly with mild soap and water
- Reapply a protective finish annually or when water no longer beads on the surface
- Lightly sand and reapply stain every 2-3 years or when the color begins to fade
Tips for Success
Here are some final tips to ensure your project turns out beautifully:
Always read and follow the manufacturer's instructions for all products. Stir stain frequently during application to maintain color consistency, and remember that less is more to apply thin coats rather than one thick coat.
Don't rush the drying process between steps. If your bench has intricate details, use a small brush to apply stain to these areas. And finally, dispose of stain-soaked rags properly to prevent spontaneous combustion (spread them out flat to dry or place in a water-filled metal container).